view 페이지인 머스태치 설정을 해보도록 하겠습니다.
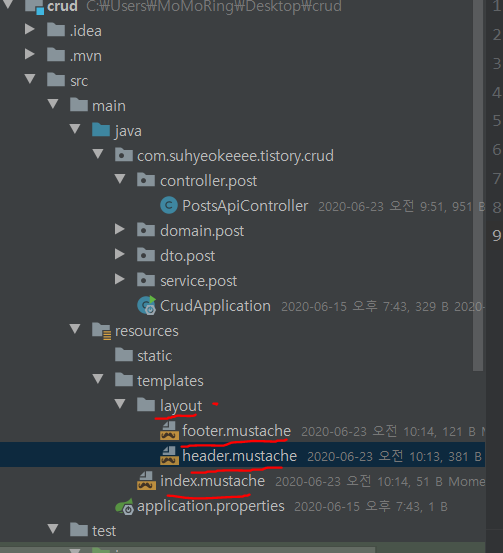
사진을 참고해서 해당 디렉토리에 파일들을 생성해주세요
resources/templates/layout/header.mustache
resources/templates/layout/footer.mustache
resources/templates/layout/index.mustache
우선 아래의 코드를 복붙해주세요
header.mustache
<!DOCTYPE HTML>
<html>
<head>
<title>게시판 서비스</title>
<meta http-equiv="Content-Type" content="text/html; charset=UTF-8"/>
<link rel="stylesheet" href="https://stackpath.bootstrapcdn.com/bootstrap/4.5.0/css/bootstrap.min.css" integrity="sha384-9aIt2nRpC12Uk9gS9baDl411NQApFmC26EwAOH8WgZl5MYYxFfc+NcPb1dKGj7Sk" crossorigin="anonymous">
</head>
<body>
footer.mustache
<!-- JS, Popper.js, and jQuery -->
<script src="https://code.jquery.com/jquery-3.5.1.min.js"></script>
</body>
</html>
index.mustache
{{>layout/header}}
<h1>hi</h1>
{{>layout/footer}}
{{>layout/header}}는 머스태치 문법으로
{{>}}는 현재 머스태치 파일을 기준으로 다른 파일을 가져 옵니다.
즉 header 코드 + <h1>hi<h1> + footer코드
이런식으로 작동되는 것 입니다.
footer에 있는 <script src="https://code.jquery.com/jquery-3.5.1.min.js"></script> 는
제이쿼리를 사용하기 위한 cdn 입니다.

다음과 같이 controller패키지에 IndexController를 만들어 줍니다.
이 컨트롤러는 view 페이지를 리턴하기 위한 컨트롤러 입니다.
이 프로젝트를 시작 할 때 추가했던 머스태치 의존성 덕분에
return "index" 라고만 해도 index.mustache 파일을 가져옵니다.

그 후 서버를 돌리고 hi라는 메세지가 나오면 성공입니다.
'SpringBoot' 카테고리의 다른 글
| SpringBoot With JPA 게시판 만들기 - 05 삭제 기능 (0) | 2020.06.23 |
|---|---|
| SpringBoot With JPA 게시판 만들기 - 04 업데이트 기능 (0) | 2020.06.21 |
| SpringBoot With JPA 게시판 만들기 - 03 글쓰기 기능 (2) | 2020.06.18 |
| SpringBoot With JPA 게시판 만들기 - 02 엔티티 설정 (0) | 2020.06.16 |
| SpringBoot With JPA 게시판 만들기 - 01 개발환경 세팅 (0) | 2020.06.15 |
